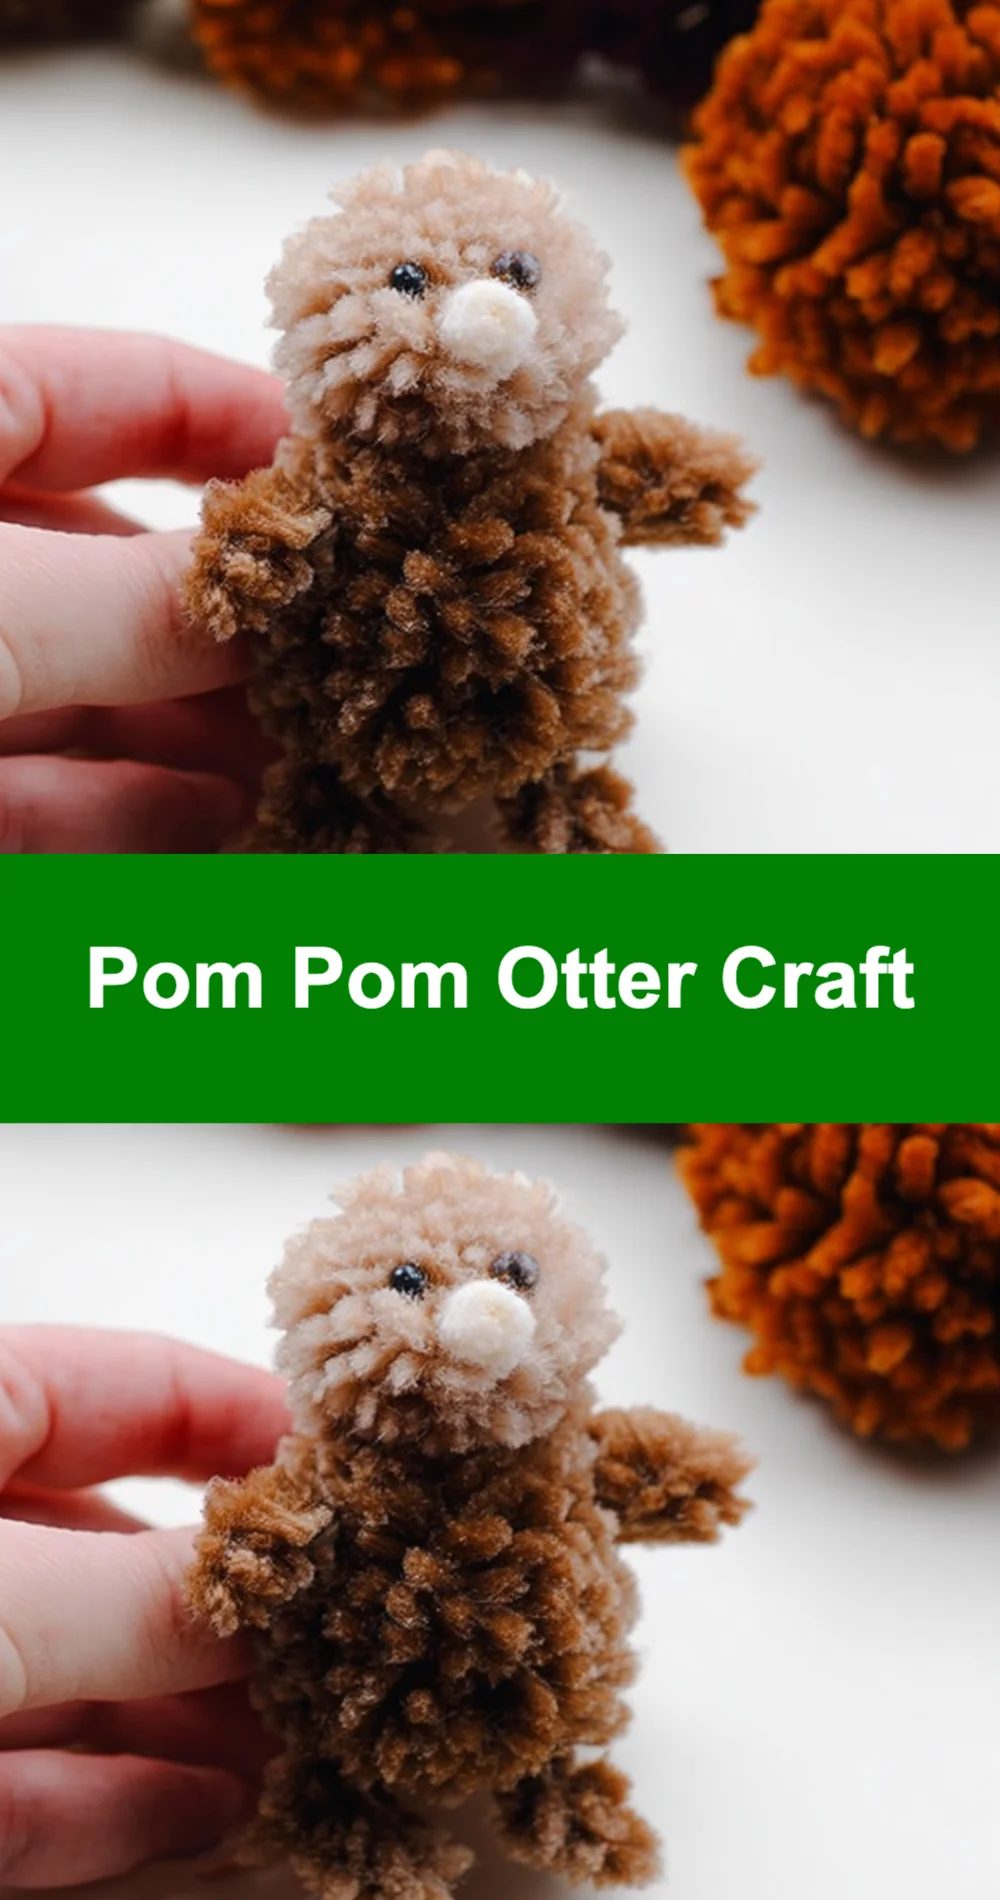
Remember those carefree afternoons spent creating fun crafts? If you’re like me, those moments spark joy and creativity! Today, I’m excited to share with you a delightful project that’s not only easy but also super fun to make: the Pom Pom Otter Craft. Whether you’re crafting with kids or just looking for a cozy way to spend some time, this adorable little otter is sure to bring a smile to your face.
Why You’ll Love Pom Pom Otter Craft
- Fast: You can whip up this cutie in no time!
- Easy: Even beginners can create this charming otter.
- Giftable: Perfect for gifts or as a fun decoration.
- Crowd-pleasing: Everyone will adore your new furry friend!
Ingredients
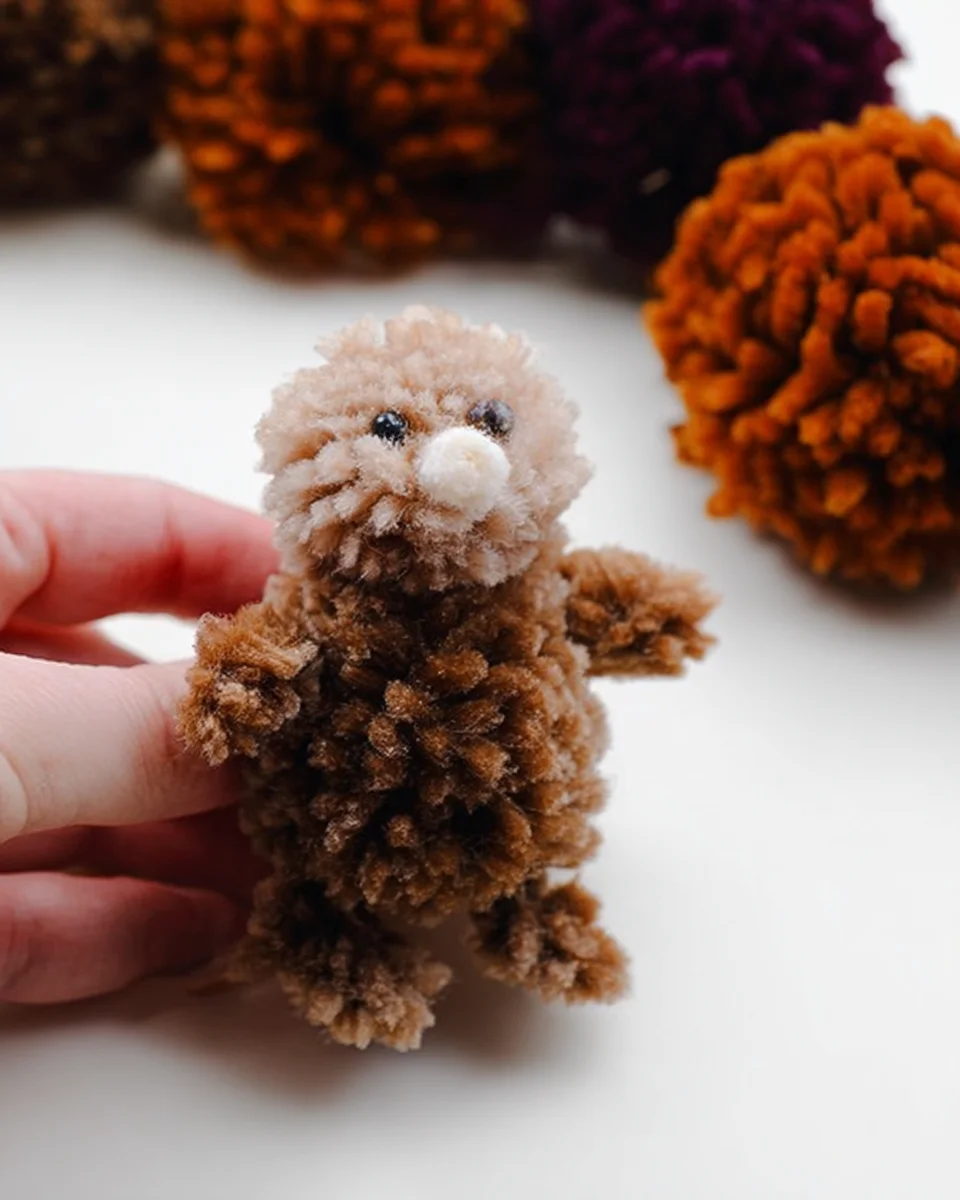
- 1 large brown pom pom – This will be the main body of your otter.
- 1 small tan pom pom – This forms the head and adds character.
- 2 small black pom poms – These are perfect for making the otter’s nose.
- 1 pair of googly eyes – Because every otter needs a cute face!
- 1 piece of felt (brown or tan) – For the ears, giving your otter some personality.
- Hot glue gun – Essential for sticking everything together.
- Scissors – To cut the felt for the ears.
- Marker (optional) – For adding a fun smile!
How to Make Pom Pom Otter Craft
Let’s dive into the crafting process! It’s as simple as 1-2-3, and I promise you’ll love every minute of it.
- Create the Otter’s Body: Start with the large brown pom pom as the otter’s body. Make sure it’s fluffy and round. This will be the base of your adorable creature.
- Make the Otter’s Head: Take the small tan pom pom and glue it to one end of the large brown pom pom to form the head. This is where the personality begins to shine!
- Add Eyes: Using the hot glue gun, attach the googly eyes to the tan pom pom. This will give your otter some character and charm.
- Create the Ears: Cut two small circles from the felt. These will become the otter’s ears. Glue them to the top of the tan pom pom for an adorable finish.
- Add Noses: Take the two small black pom poms and glue them below the googly eyes to form the nose. This is where your otter really starts to come to life!
- Finishing Touches: If desired, use a marker to draw a smile on the otter’s face. This little detail makes all the difference!
- Let It Dry: Allow your craft to sit for a few minutes to ensure all the glue is dry. Patience is key!
Substitutions & Additions
If you want to get creative, feel free to swap out the colors of the pom poms or use different materials for the ears. You could even add accessories like a tiny scarf or a little fish for your otter to hold! The possibilities are endless. For more fun crafting ideas, check out some of my favorite projects like the Cookely blog for inspiration.
Tips for Success
- Be generous with the glue, but not too much that it oozes out! A little goes a long way.
- If you’re crafting with kids, supervise them while using the hot glue gun.
- Prep all your materials before starting to make the process smoother.
- Consider making a whole family of otters for extra fun!
How to Store Pom Pom Otter Craft
Your Pom Pom Otter is a cute decoration, so storing it is easy! Simply keep it in a dry place, away from direct sunlight to prevent any fading. It’s best enjoyed on a shelf or as part of your home decor. This little friend can last for years if cared for properly!
FAQs
Can I use different materials instead of pom poms?
Absolutely! You can use yarn, felt, or even fabric scraps to create your otter.
Is this a good craft for kids?
Yes! It’s perfect for kids with adult supervision for the glue.
How long will it take to make?
This craft can typically be completed in about 30 minutes.
Can I customize my otter?
Of course! Feel free to add accessories or change colors to make it uniquely yours.
Crafting is not just about the finished product; it’s about the joy and memories made along the way. I hope you enjoy making your Pom Pom Otter Craft as much as I did! For more delicious recipes, check out Twix Cookie Cups or Decadent Butterscotch Pudding for treats you will love!
Don’t forget to follow us on Pinterest for more fun and creative ideas!
Pom Pom Otter Craft
Ingredients
Equipment
Method
- Step 1: Start with the large brown pom pom as the otter's body. Make sure it’s fluffy and round.
- Step 2: Glue the small tan pom pom to one end of the large brown pom pom to form the head.
- Step 3: Attach the googly eyes to the tan pom pom using the hot glue gun.
- Step 4: Cut two small circles from the felt for the otter’s ears and glue them to the top of the tan pom pom.
- Step 5: Glue the two small black pom poms below the googly eyes to form the nose.
- Step 6: Use a marker to draw a smile on the otter’s face, if desired.
- Step 7: Allow your craft to dry for a few minutes.
Notes