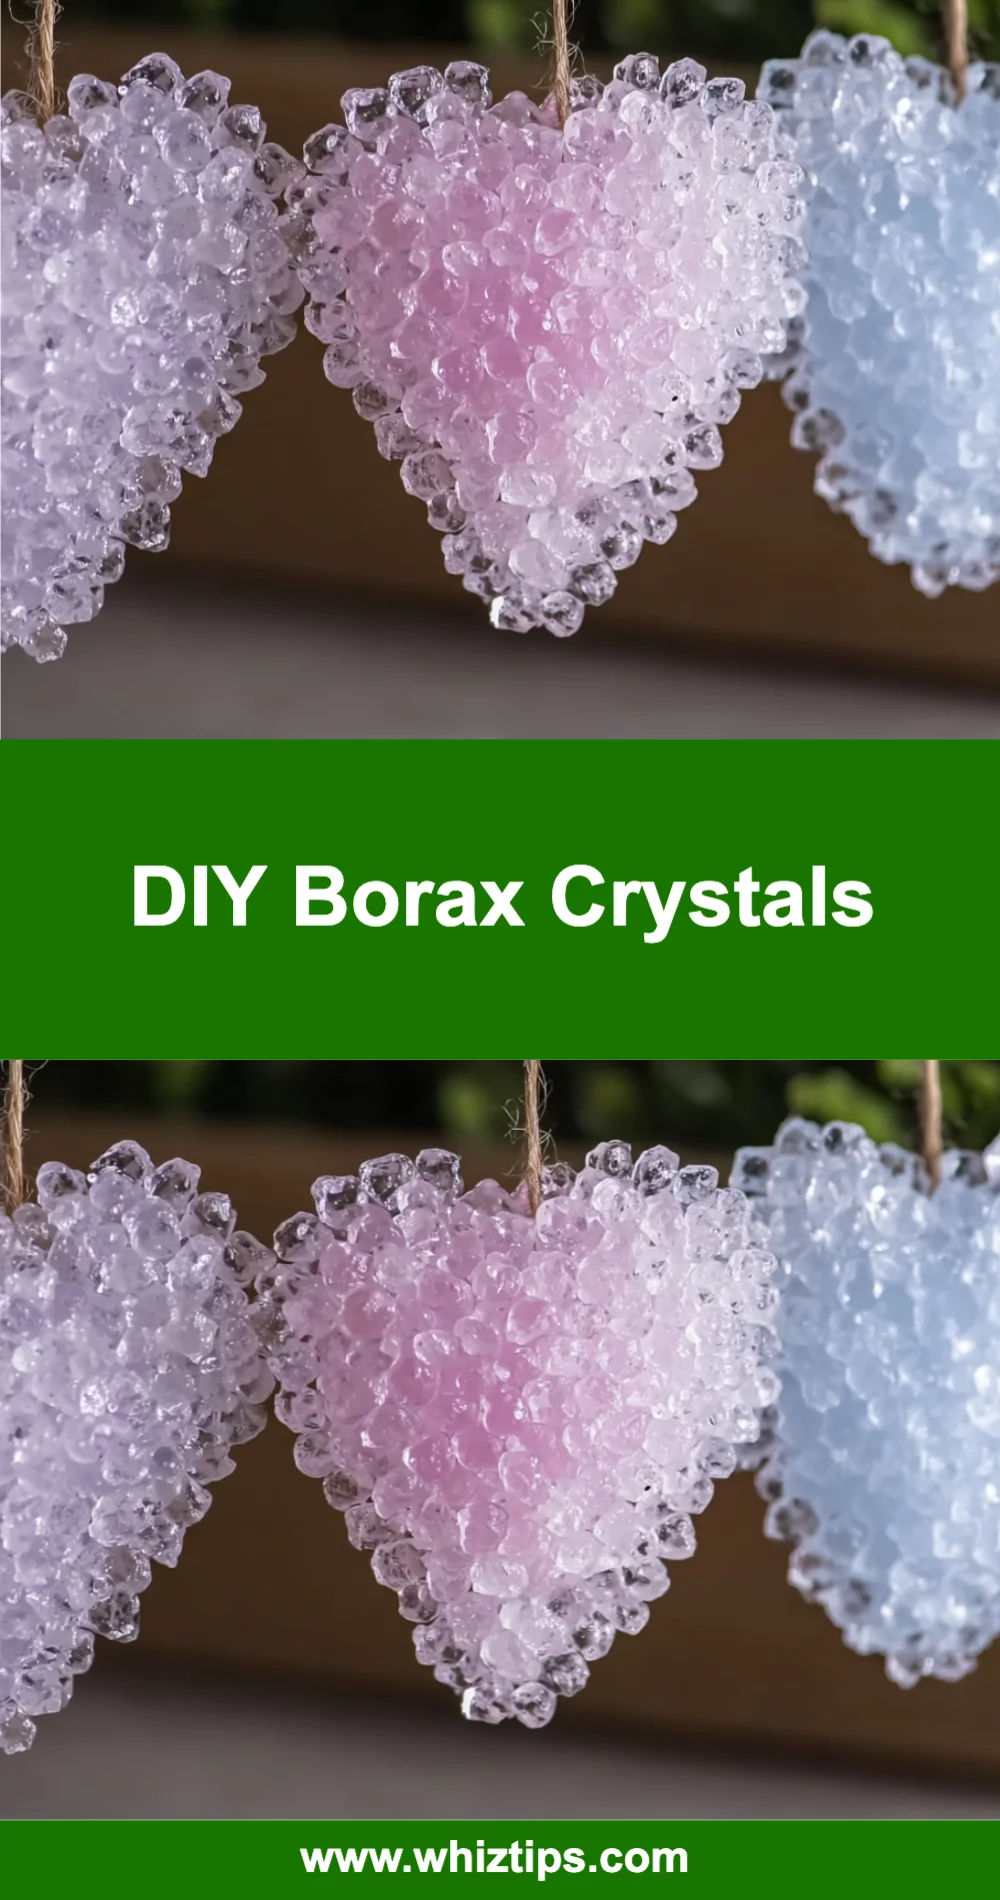
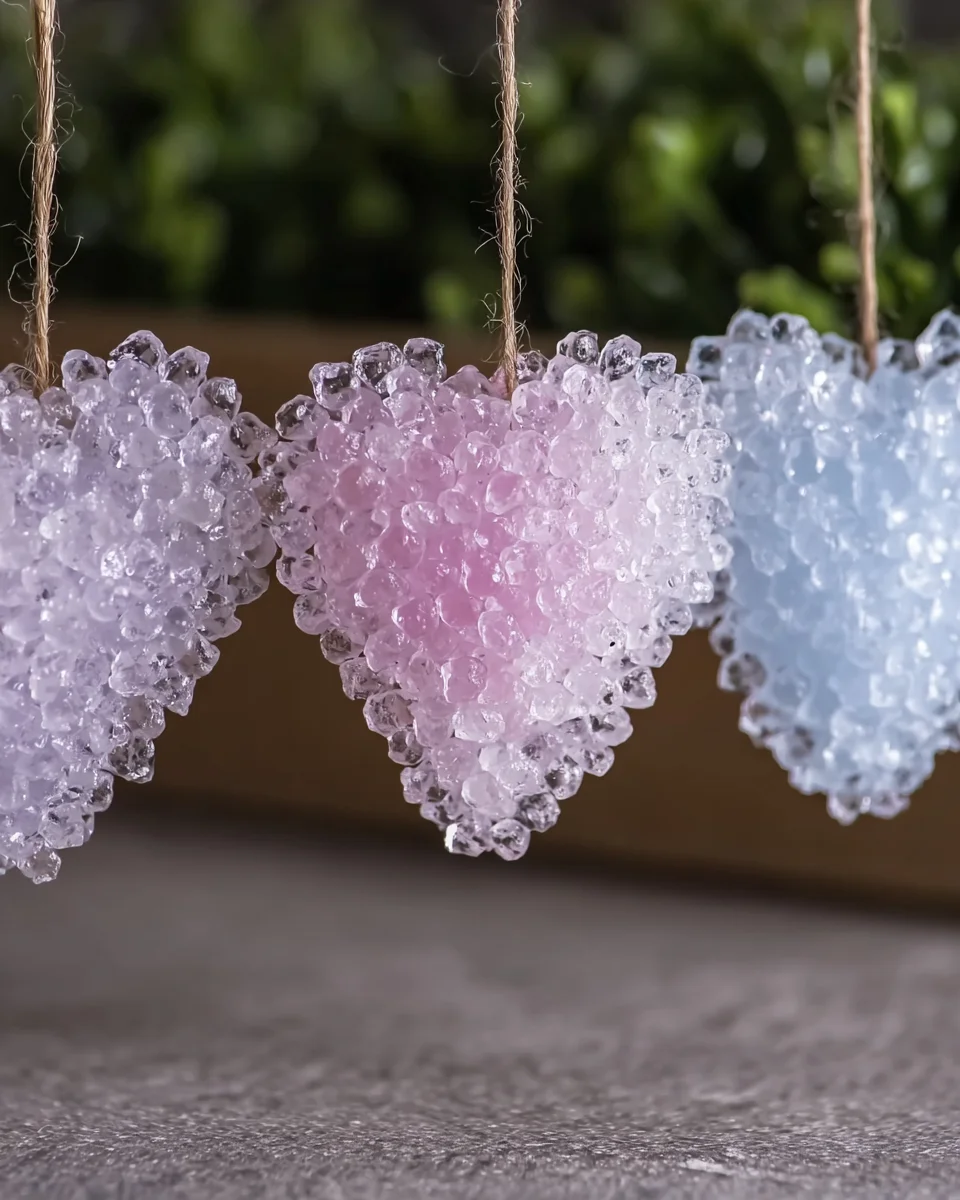
DIY Borax crystals are fascinating and visually stunning creations made through a simple crystallization process. This hands-on activity combines science and artistry, allowing anyone to produce beautiful crystals using household ingredients. With just a few materials, you can create your own mesmerizing Borax crystals.
| Prep Time | Cook Time | Total Time | Servings | Difficulty | Cuisine |
|---|---|---|---|---|---|
| 10 minutes | 0 minutes | Varies | 1 recipe | Easy | American |
Why This Recipe Works
This DIY Borax crystal recipe works due to the solubility of Borax in hot water. When the solution cools, the water evaporates, leaving behind solid crystals. I’ve made these crystals multiple times, and each time I’m amazed at how different the final product can be based on factors like temperature and time. Watching the crystals grow is not only rewarding but also a great educational experience for both kids and adults.
Another reason this project is successful is its simplicity. The ingredients are easy to find, and the steps are straightforward. The entire process allows for creative expression, as you can experiment with different shapes and sizes of crystals by adjusting the setup. It’s a perfect blend of art and science that captivates anyone who tries it.
Ingredients
| Ingredient | Quantity | Notes |
|---|---|---|
| Borax | 1 cup | Available at grocery stores or online. |
| Water | 3 cups | Use hot water for better dissolution. |
| Glass jar | 1 | A clean jar helps prevent contamination. |
| Stirring stick or spoon | 1 | For mixing the solution. |
| String or pipe cleaner | Optional | For hanging the crystals while they grow. |
| Pencil or stick | 1 | Used for suspending the string. |
Step-by-Step Instructions
-
Prepare the Solution
Heat 3 cups of water in a pot until it’s nearly boiling. Remove from heat.
-
Mix in Borax
Gradually add 1 cup of Borax to the hot water, stirring continuously until all the Borax is dissolved. You should not see any undissolved particles at the bottom of the pot.
-
Set Up for Crystallization
Pour the Borax solution into a clean glass jar. If using string or a pipe cleaner, tie one end to a pencil or stick and place it across the top of the jar so that the string hangs down into the solution without touching the bottom.
-
Cool and Wait
Allow the jar to sit undisturbed in a cool place. Over the next few hours or days, crystals will begin to form. The longer you leave the jar, the larger the crystals will grow.
-
Remove Crystals
Once you are satisfied with the size of the crystals, carefully remove them from the solution. If you used string or a pipe cleaner, gently pull it out.
-
Dry the Crystals
Place the crystals on a paper towel or a plate to dry completely.
-
Display
Your DIY Borax crystals are now ready to be displayed or used for educational purposes!
Chef Tips for Perfect Results
- Ensure the water is hot enough for complete dissolution of Borax.
- Use a clean jar to avoid impurities affecting crystal growth.
- Allow the crystals to grow undisturbed for optimal size and clarity.
- Experiment with different hanging methods to create unique shapes.
- Try varying the temperature of the water for different crystal sizes.
Common Mistakes to Avoid
- Not dissolving Borax completely can lead to smaller or incomplete crystals. Make sure to stir until fully dissolved.
- Placing the jar in a warm area can cause rapid evaporation. Choose a cool location for better results.
- Touching the solution or crystals can disrupt growth. Handle only when necessary.
- Using contaminated jars or utensils may introduce impurities. Always use clean equipment.
Variations and Substitutions
| Ingredient | Substitution | Impact on Flavor |
|---|---|---|
| Borax | None | Essential for crystal formation. |
| Water | Distilled water | Can lead to purer crystals. |
Serving Suggestions and Pairings
These DIY Borax crystals are perfect for educational displays or science fairs. They can also be used as beautiful decorations in homes or classrooms. Pair your crystal-making activity with a science lesson about crystallization or geology for a complete educational experience.
Storage and Reheating
| Method | Duration | Instructions |
|---|---|---|
| Display | Indefinite | Store in a dry place away from direct sunlight. |
| Handling | Indefinite | Keep out of reach of children and pets. |
Nutritional Information
| Nutrient | Amount per Serving |
|---|---|
| Calories | N/A |
| Fat | N/A |
| Carbohydrates | N/A |
Frequently Asked Questions
Can I substitute Borax with another substance?
No, Borax is essential for creating these crystals. Other substances won’t yield the same results.
How long does it take for the crystals to form?
Crystals can begin to form within a few hours, but leaving them for several days will produce larger crystals.
What should I do if my crystals aren’t forming?
If crystals aren’t forming, ensure the Borax was completely dissolved, and check if the environment is too warm.
Can this be made ahead of time?
Yes, you can set up the crystals in advance, but they should be displayed once fully dried.
Are these crystals safe for children?
While the activity is educational, Borax is not food-safe. Supervision is required to keep it away from children and pets.
Creating DIY Borax crystals is an engaging and educational activity that brings science to life. The mesmerizing results can inspire creativity and curiosity, making it perfect for both home and educational settings. For more delicious recipes, check out the delightful strawberry crunch cheesecake recipe or the decadent self-saucing butterscotch pudding recipe for treats you will love!
DIY Borax Crystals
Ingredients
Equipment
Method
- Step 1: Heat 3 cups of water in a pot until it's nearly boiling. Remove from heat.
- Step 2: Gradually add 1 cup of Borax to the hot water, stirring continuously until all the Borax is dissolved. You should not see any undissolved particles at the bottom of the pot.
- Step 3: Pour the Borax solution into a clean glass jar. If using string or a pipe cleaner, tie one end to a pencil or stick and place it across the top of the jar so that the string hangs down into the solution without touching the bottom.
- Step 4: Allow the jar to sit undisturbed in a cool place. Over the next few hours or days, crystals will begin to form. The longer you leave the jar, the larger the crystals will grow.
- Step 5: Once you are satisfied with the size of the crystals, carefully remove them from the solution. If you used string or a pipe cleaner, gently pull it out.
- Step 6: Place the crystals on a paper towel or a plate to dry completely.
- Step 7: Your DIY Borax crystals are now ready to be displayed or used for educational purposes!
Notes