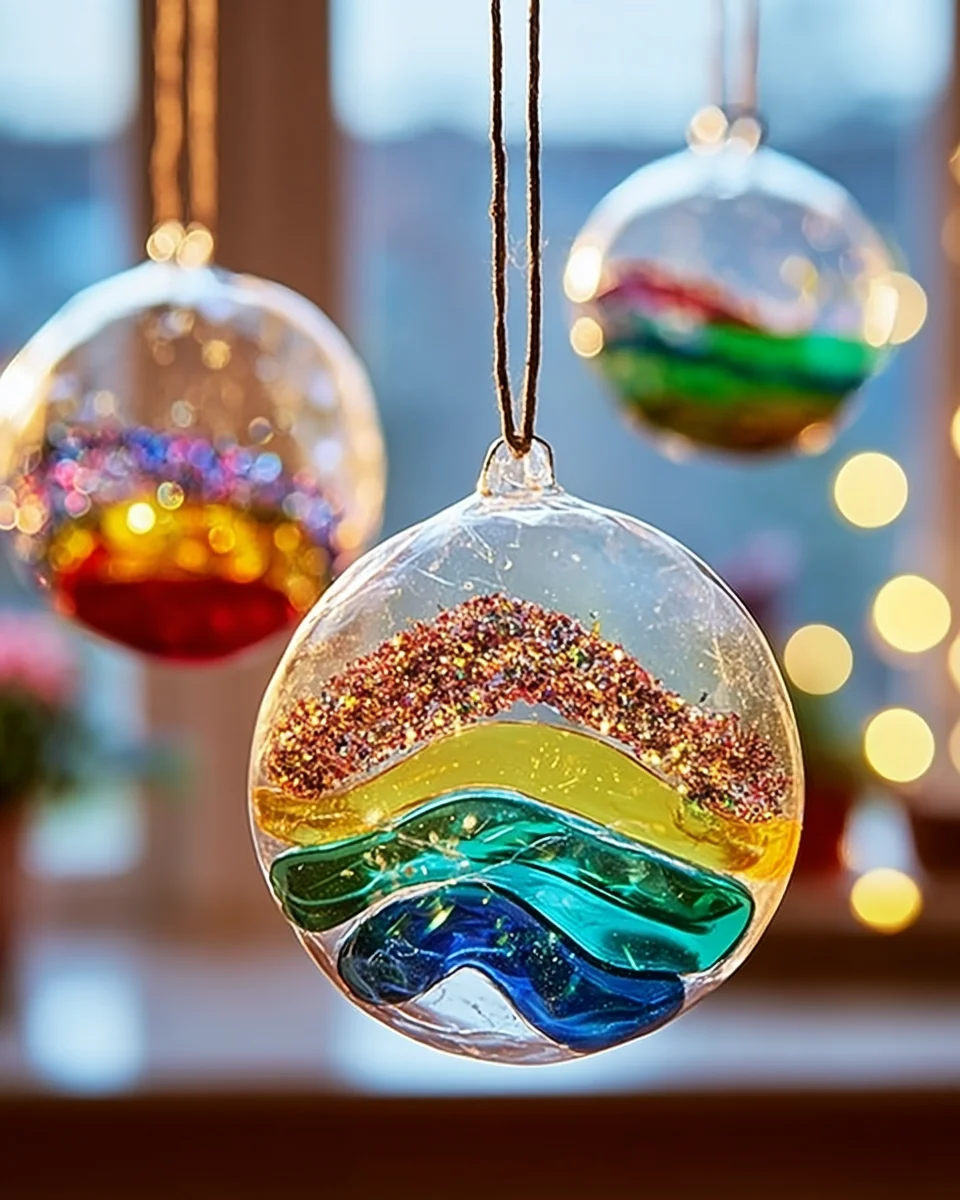
Do you remember those sunny afternoons as a child, when you would gaze at the rainbow of colors dancing across your walls? Those magical moments can be recreated with a fun and easy DIY project: suncatchers! Not only are these delightful creations a breeze to make, but they also bring joy and a splash of color into your home. Trust me; you’ll want to make these with your kids or even have a crafty day with friends!
Why You’ll Love Easy DIY Suncatchers: Make Colorful Window Art for All Ages!
- Fast
- Easy
- Giftable
- Crowd-pleasing
Ingredients
- Clear plastic sheets or transparency film: These are the base of your suncatchers and can be found at craft stores.
- Permanent markers or acrylic paint: Choose vibrant colors to make your suncatchers pop!
- Black construction paper: Optional, but it adds a lovely border if you want a polished look.
- Scissors: For cutting your shapes.
- Hole punch: To create a hanging hole at the top of each suncatcher.
- String or fishing line: This is what will hold up your beautiful creations.
- Optional: Glitter, small beads, or other embellishments for extra flair!
How to Make Easy DIY Suncatchers: Make Colorful Window Art for All Ages!
- Start by cutting the clear plastic sheets into your desired shapes. Think circles, hearts, stars, or whatever shapes spark your creativity!
- Now for the fun part! Use your permanent markers or acrylic paint to decorate the plastic shapes. Let your imagination run wild with colorful designs. Once you’re done, allow the paint or marker to dry completely.
- If you want to add a touch of elegance, cut pieces of black construction paper to create borders for your suncatchers. Glue these borders to the edges of your colorful shapes.
- Grab your hole punch and make a hole at the top of each suncatcher. This will be where you hang them.
- Cut a length of string or fishing line and thread it through the hole. Tie a knot to secure it, ensuring it’s ready to hang.
- Finally, find a sunny window and hang your suncatchers. Watch in delight as the sunlight streams through, creating a beautiful display of colors!
Substitutions & Additions
Feel free to get creative! Instead of clear plastic sheets, you can use old CD cases or even cut up plastic containers. And if you want to add an extra sparkle, sprinkle some glitter on your designs before they dry. You could also use stickers or other embellishments to personalize your suncatchers even more.
Tips for Success
- Make sure to let the paint dry completely before handling your suncatchers to avoid smudging.
- If you’re working with kids, consider using washable markers to minimize mess.
- Prep ahead by cutting the plastic shapes and borders beforehand, making it easier for everyone to join in on the fun!
How to Store Easy DIY Suncatchers: Make Colorful Window Art for All Ages!
If you ever want to take your suncatchers down (perhaps for the change of seasons), gently remove them and store them flat in a cool, dry place. They should last for many seasons if stored properly!
FAQs
Can I use regular markers instead of permanent ones? Regular markers may wash off, especially if exposed to moisture, so I recommend using permanent markers or acrylic paint for lasting results.
How long do these suncatchers last? If taken care of, your suncatchers can last for years! Just avoid direct contact with moisture.
Can I make this project with younger kids? Absolutely! Just ensure they are supervised with scissors and paint, and have fun creating together!
Making these Easy DIY Suncatchers is not just a craft; it’s a way to bring warmth and color into your home, creating memories along the way. For more delicious recipes, check out the delightful Twix Cookie Cups or the decadent self-saucing butterscotch pudding you will love! And don’t forget to follow us on Pinterest for more creative ideas and inspiration!
Easy DIY Suncatchers
Ingredients
Equipment
Method
- Step 1: Start by cutting the clear plastic sheets into your desired shapes. Think circles, hearts, stars, or whatever shapes spark your creativity!
- Step 2: Use your permanent markers or acrylic paint to decorate the plastic shapes. Let your imagination run wild with colorful designs. Once you're done, allow the paint or marker to dry completely.
- Step 3: Cut pieces of black construction paper to create borders for your suncatchers. Glue these borders to the edges of your colorful shapes.
- Step 4: Use a hole punch to make a hole at the top of each suncatcher for hanging.
- Step 5: Cut a length of string or fishing line and thread it through the hole. Tie a knot to secure it.
- Step 6: Hang your suncatchers in a sunny window and enjoy the beautiful display of colors!