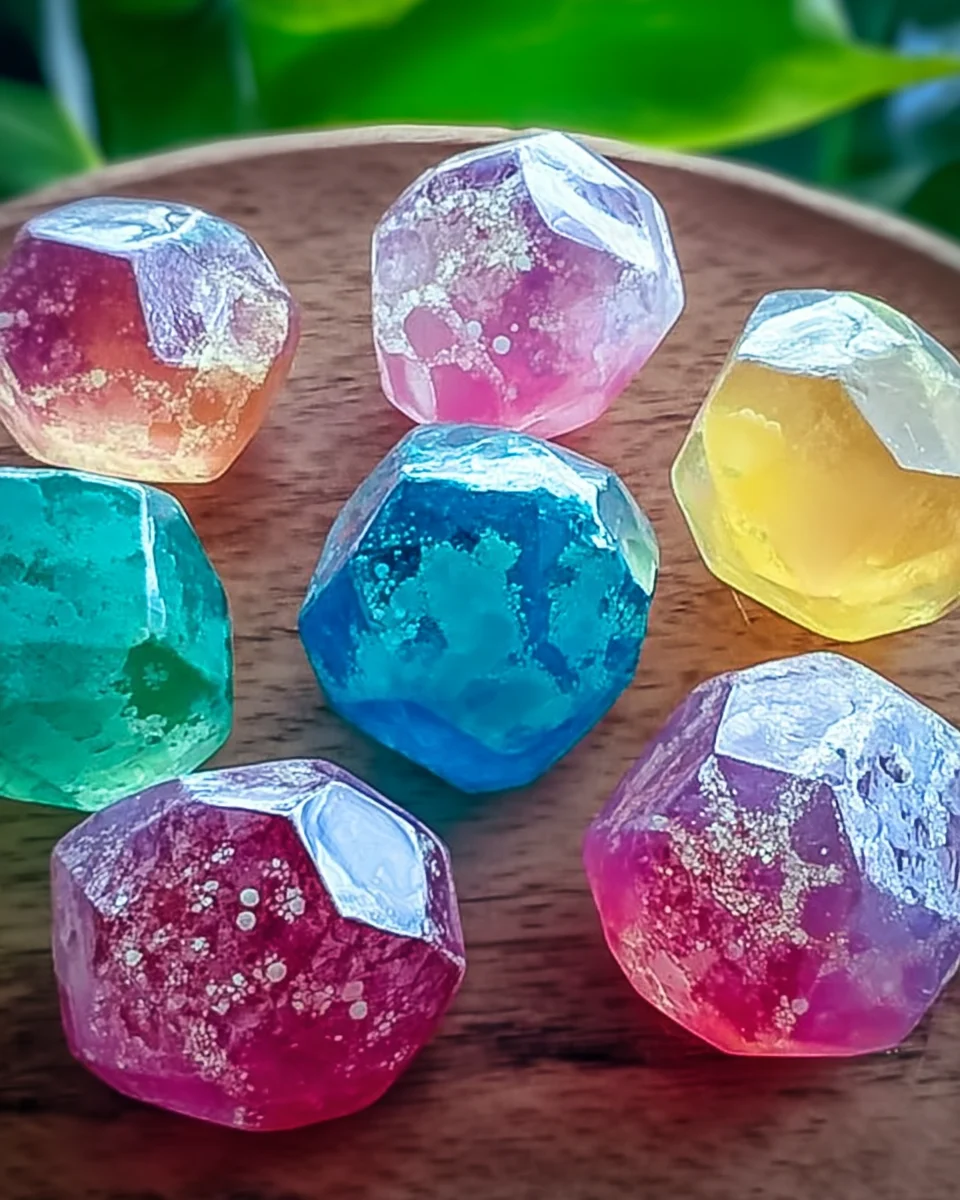
Remember those sunny afternoons spent creating magic with your kids? Crafting is not just a pastime; it’s a way to bond and unleash creativity! Today, I’m excited to share a delightful and easy recipe for making Magical DIY Color Changing Treasure Stones. This fun craft is perfect for kids and will surely bring smiles and a splash of color to your day. Plus, it’s quick and simple, making it an ideal project for a rainy day or a weekend adventure!
Why You’ll Love Magical DIY Color Changing Treasure Stones: Easy Kids Craft
- Fast
- Easy
- Giftable
- Crowd-pleasing
Ingredients
- 1 cup baking soda: The main component that gives your stones their unique texture.
- 1/2 cup white vinegar: This is where the fun starts! The reaction with baking soda creates fizz.
- 1/2 cup corn syrup: This adds a nice sheen and helps bind the mixture together.
- Food coloring (various colors): Get creative! Choose your favorite colors to make your stones pop.
- 1 tablespoon cornstarch: This helps to firm up the texture.
- Optional: glitter for decoration: Because who doesn’t love a bit of sparkle?
How to Make Magical DIY Color Changing Treasure Stones: Easy Kids Craft
Let’s get started on this colorful adventure!
- In a mixing bowl, combine the baking soda and cornstarch. This is your base mixture.
- Slowly add the white vinegar to the dry mixture, stirring continuously. Watch as it fizzes up! This reaction is so satisfying.
- Once the fizzing settles down, add the corn syrup and mix until smooth. You want a nice, thick consistency here.
- Divide the mixture into separate bowls based on how many colors you’d like to create.
- Add a few drops of food coloring to each bowl. Mix until you achieve your desired colors. Have fun with it!
- Spoon the colored mixtures into silicone molds or onto a baking sheet lined with parchment paper. The silicone molds are great for shaping!
- Allow the stones to dry for 24 hours or until fully hardened. Patience is key here.
- Once dry, gently remove the stones from the molds. If you want to add some sparkle, sprinkle them with glitter.
- To reveal the color-changing effect, simply place the stones in warm water. Enjoy the magic!
Substitutions & Additions
If you’re looking to mix things up a bit, here are a few suggestions:
- Use natural food coloring if you prefer a more organic approach.
- Add essential oils for a delightful scent.
- Try adding small beads or shells into the mixture for added texture.
Tips for Success
Here are some tips to ensure your treasure stones turn out perfect:
- Make sure to mix the dry ingredients well before adding vinegar to avoid clumping.
- Adjust the amount of food coloring based on how vibrant you want your stones to be.
- If you live in a humid area, consider letting them dry in a cool, dry place for better results.
How to Store Magical DIY Color Changing Treasure Stones: Easy Kids Craft
Once your treasure stones are dry, store them in an airtight container to keep them safe and sound. They can last for several weeks, but don’t let them soak in water for too long, or they may lose their color-changing magic!
FAQs
- Can I use different types of molds? Absolutely! Silicone molds are great, but you can also use cupcake liners or any shape you prefer.
- What if my stones don’t change color? Make sure you are using warm water for the best effect. Cold water won’t activate the color change.
- Can kids help with this project? Yes! This is a perfect family-friendly craft. Just supervise younger children during the mixing process.
Creating these Magical DIY Color Changing Treasure Stones is not just about making something beautiful; it’s about the joy of crafting with your loved ones. For more delicious recipes, check out the Twix Cookie Cups or Amish Peanut Butter Cream Pie for treats you will love!
Don’t forget to share your colorful creations! You can also follow us on Pinterest for more fun ideas and inspiration.
Magical DIY Color Changing Treasure Stones
Ingredients
Equipment
Method
- Step 1: In a mixing bowl, combine the baking soda and cornstarch. This is your base mixture.
- Step 2: Slowly add the white vinegar to the dry mixture, stirring continuously. Watch as it fizzes up!
- Step 3: Once the fizzing settles down, add the corn syrup and mix until smooth.
- Step 4: Divide the mixture into separate bowls based on how many colors you'd like to create.
- Step 5: Add a few drops of food coloring to each bowl and mix until you achieve your desired colors.
- Step 6: Spoon the colored mixtures into silicone molds or onto a baking sheet lined with parchment paper.
- Step 7: Allow the stones to dry for 24 hours or until fully hardened.
- Step 8: Once dry, gently remove the stones from the molds and sprinkle them with glitter if desired.
- Step 9: To reveal the color-changing effect, simply place the stones in warm water.